In this tutorial, we will learn how to add a property and advertise it on Wamago.com following this easy step-by-step guide. There are 5 mandatory steps and 3 optional steps that can be skipped.
Sign in to your Wamago account. If you haven’t register a Wamago account yet, it is time to do it. We have explained in a previous post how to register an account.
1. Properties Headlines That Sell!
Good title and nice short description are very powerful tools to market your property and attract potential buyers and renters. Well written headline improves your property ranking in search engines such as Google, Bing or others, it is recommended that the title provides three essential information:
- Property’s Type: Townhouse, Apartment, Studio… etc. (important!)
- Property’s Status: Whether the property is “For Sale” or “For Rent” (important!)
- The Location – City, Neighborhood: “Mikonos, Ionian Islands” or “Verdun, Beirut” or “Larnaca”…
Titles examples:
Three Stories Townhouse For Sale in Athens
Apartment For Sale in Verdun Beirut
Spacious Apartment For Rent in Dubai
Penthouse For Sale or Rent in Limassol
Captivating House For Sale in Varna

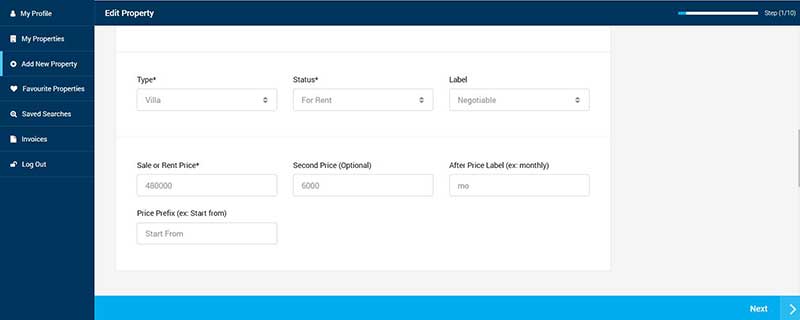
Scroll down the page and select the Type, Status and Label (optional). Fill in all the empty fields.
- Sale or Rent Price (Only digits): Enter the price for sale or for rent of your property – e.g. 450000
- Second Price (Display optional price for rental or sale price per square meter): This is optional price where you can show price per square meter, rent or you can use as you want – e.g. 1200
- After Price label: This field is related to the Second Price. Anything like SqM, or /monthly etc… will be fine.
- Price Prefix: This field is related to Sale and Rent Price. Anything like “Start from” or else will be fine.

Click on Next button to save your work and go to next step.
2. Property Media
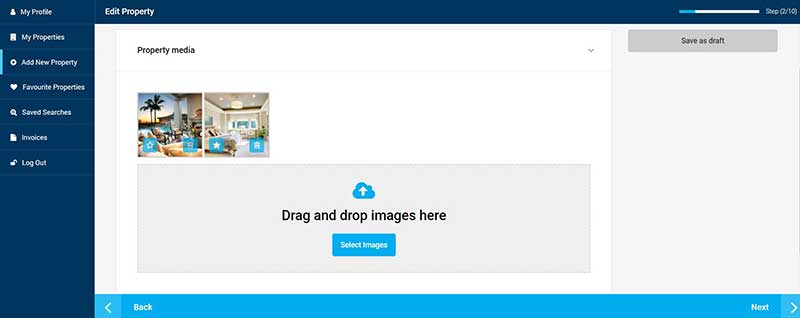
Here is where you can upload your property’s images

- Property Media (Gallery Images): Click on Select Images to start uploading your images or just drag and drop.
- After uploading your images, you can re-order them with a simple drag and drop.
- These images will be displayed in the property’s gallery.
Note: Minimum image size: width: 1170 pixels / height 738 pixels and max weight 1 MB. Upload HORIZONTAL high quality images; system will reject vertical images.
Property Details:

This is the crucial part of your property. Usually, customers look for specific details in their search for properties whether to buy or rent
- Area Size (Only digits): Insert area size
- Size Prefix: Skip (It is set to M2)
- Land Area Size (Only digits): Insert area size
- Land Area Size Prefix: Skip (It is set to M2)
- Bedrooms: Insert number of bedrooms
- Bathrooms: Insert number of bathrooms
- Garages: Insert number of garage
- Garages Size: Insert garage size
- Year Built: Insert the year when the property was built
- Video URL: Provide video URL. YouTube, Vimeo, SWF file and MOV file are supported.
Fill only “Land Area Size” if the property is a Land and leave all other fields empty.
Additional Featured

You can add whatever you want of Additional Features or you can click on next.
Example: if a 20% deposit is required then add a new feature or if the property has 2 Master Bedrooms.
For title write “Deposit” and for value add “20%”.
- Title, Deposit – Value, 20%
- Title, Master Bedrooms – Value, 2
However, be aware that there are a large set of Property Features in ‘Step 3″. Have a quick look to avoid duplicated features.
3. Property Features

Select one or more features that your property has.
4. Property Location

Property location is very important to help customers find your property in Wamago. Potential customers usually look for properties in specific city and neighborhood.
1. Address(only street name and building no): Insert only street name and building number
2. Country: Select a country
3. Region/District: It refers to the region or district: e.g. Region “Attica” in Greece or the district (qadā’) “Beirut” in Lebanon. if your property is located in the region ATTICA, select it from the drop down. This will filter all cities in that region.
4. City: Same as in Region/District or Municipality (Qatar), select the city where the property is located. In case your city is not listed in the dropdown menu, make sure you include it in the Address field and the property’s title. We will add it later for you.
5. Neighborhood: Places within a city. Example: Ashrafieh, Mseitbeh are located in Beirut Municipality. In case your Neighborhood is not listed in the dropdown menu, make sure you include it in the Address field. We will add it later for you.
6. Postal Code / Zip: Insert the Zip/Area code if available (USA)

If your location doesn’t show up in Google Map as soon as you start typing your address, we’ve create two easy alternatives for you. In addition, you can chose to show or hide the Map Street View.
1. Property Location at Google Map: Drag the google map marker to point your property location
2. If you already have the Google Map coordinates of your location such as “Longitude” and Latitude” insert them here.
3. Google Map Street View: Select if you want to show or hide the Google Map Street View on the property page. (not available in some countries)
5. 360° Virtual Tour

Virtual Tour: paste here the embedded code to show the 360° virtual tour on property page.
Skip and go to next step if not available.
6. Floor Plans

Here you can insert the floor plan of your property. You can skip this step if you don’t have a floor plan. You can always come back later and edit the property to add a floor plan
1. Floor Plans: Enabling this feature you can add unlimited floor plans information to your property.
2. Plan Title: Insert plan title. If your property is duplex apartment, you may want to showcase what has each floor. Example: First Floor Plan
3. Plan Bedrooms: Insert number of plan bedrooms that this floor has
4. Plan Bathrooms: Insert number of plan bathrooms that this floor has
5. Plan Price: In case a customer or real estate agent wants a copy of the floor plan, you can give for a price. Example: 5 (without the currency symbol). Leave it empty if you wont charge for it, it’s up to you!
6. Price Postfix: Insert price currency of the floor plan. Example: $
7. Plan Size: Insert the floor size that the floor plan showcases.
8. Plan Image: Upload the floor plan image
9. Plan Description: Write a small description of this floor or Leave empty
10. Click on Add more button if you need to add more property plans
7. Multi Units / Sub Properties
This feature is very useful if your property is a building and has several apartments and or if is commercial center and has multi stores units and or office. It allows you to list multi units or sub properties below one property.You can add as much sub properties as you want.
You can skip this step if it’s not the case.

Start by enabling this feature and insert a title for your sub property. Follow the tutorial below.

Remember that you can always skip this feature and add several listings, one for each unit or sub property.
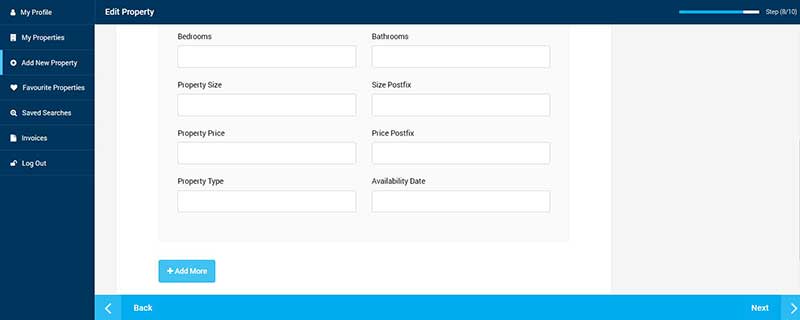
1. Multi Units / Sub Properties: enable or disable
2. Title: Add the unit title. Example: Ground Floor Apartment
3. Price: Insert unit price
4. Price Postfix: Insert price currency of the floor plan. Example: $
5. Bedrooms: Number of bedrooms
6. Bathrooms: Number of bathrooms. Leave empty if it is a commercial property
7. Property Size: Insert the area size. Example: 145
8. Size Postfix: insert the postfix for sizes like Sqft or Mtsq at your choice.
9. Property Type: Insert the property type, it can be anything like Apartment, Studio, Chalet or Store, Office, etc…
10. Availability Date: insert the date of availability (it might be under construction).
11. Click on + Add more button do add more sub unit
Soon, you will be able to add images for each sub unit / property.
8. Click on Update Property and you are done!

You can add a private note about this property. Only you can see it each time you are logged in.
You have added your first property. Adding more properties is easier now. Keep on the good job.


